Tablecloth Backdrop DIY: Create Stunning Backdrops Easily
Get more out of any event with a beautiful custom backdrop made using tablecloths. In this post, we will walk you through just how easily you can create a DIY backdrop for photos, parties, or special occasions using tablecloths. Whether you’re a beginner or you have a wealth of experience making your own backdrops, our comprehensive instructions will help you cultivate eye-catching displays for any occasion.

Key Takeaways
- Creating a DIY photo backdrop with tablecloths is a versatile and cost-effective way to add something special to various occasions.
- Tablecloth options include vibrant plastic and elegant fabric to cater to different aesthetic preferences.
- Setup and cleaning are straightforward, so it is an accessible choice no matter your experience level.
- Personalizing the backdrop with custom tablecloths can help you match any theme or color scheme.
- We supply high-quality custom tablecloths that you can design specifically for your backdrops to create stunning personalized looks.
Table of contents
-
Tablecloth Backdrop DIY
-
Steps To Make A DIY Table Cover Backdrop
-
How Do You Create A Photo Booth Backdrop Using Plastic Tablecloths?
-
How Do You Make A Fringe Backdrop?
-
How Do You Make Plastic Tablecloths Look Nice For A Backdrop?
-
What Are The Best Materials For A DIY Backdrop?
-
How Do You Cut Plastic Tablecloth For A Backdrop?
Tablecloth Backdrop DIY
Creating a DIY photo backdrop with tablecloths is a great way to personalize a photoshoot or even an event. You will love the versatility and cost-effectiveness of this approach, as you can achieve stunning results without breaking the bank.
There are a variety of tablecloth types available to you for this, including:
- Plastic for color and vibrancy
- Fabric for a more elegant, sophisticated feel
With the flexibility of this approach, you can match any theme or color scheme with ease, whether as a photo backdrop for a wedding, birthday, or casual gathering. And you can tailor the look of your tablecloth using our service to create the best table covers for events.
Setup and cleanup are straightforward, and a little creativity can lead to a memorable backdrop whatever your needs.

Materials Needed For A Tablecloth Backdrop DIY
Creating a backdrop with tablecloths is simple, but you will need a few essential materials. Let’s take a look at what’s required:
- A selection of tablecloths that match your aesthetic and practical needs, considering different types of tablecloths like plastic or fabric depending on the desired ambiance.
- Scissors to trim the tablecloths to the right size and shape.
- Tape to secure the table covers in place.
- A backdrop stand to hold the tablecloth with stability and structure.
There are also various optional supplies that you may need. You could add balloons for a festive element, or fairy lights to create a magical ambiance. Additional clips and/or string will probably be useful for attaching extra decorative items. With these materials, you have all you need to create an eye-catching, personalized table cover backdrop.
Steps To Make A DIY Table Cover Backdrop
Exploring how to make a backdrop with tablecloths is a rewarding and straightforward project that can personalize your photoshoot or event. By carefully following a step-by-step process, you can transform simple tablecloths into stunning visual centerpieces. This is the perfect solution for anyone who wants a cost-effective custom solution to reflect their style or theme.
Our custom print-on-demand tablecloths are particularly effective for DIY backdrops, allowing you to tailor features like:
- Colors
- Patterns
- Materials
No matter what occasion you’re preparing for, a homemade backdrop can enhance the ambiance. Read on to learn the steps required to make your own beautiful DIY tablecloth backdrop for a memorable display.
Step 1, Select Your Color Palette
Choosing the optimal color palette for your DIY tablecloth backdrop is key to enhancing the wider aesthetic. We recommend that you start by selecting colors that align with the event theme, such as:
- Soft pastels: Perfect for a baby shower.
- Bold hues: A good fit for a birthday party.
You can use things like the color wheel and color theory to find complementary colors that work well together. Colors opposite each other on the wheel, like dark blue and yellow, create eye-catching contrasts, while adjacent colors like red and orange offer harmonious blends.
Consider the mood you aim to evoke. Warm reds and yellows create energy, while cool blues and greens impart a sense of calm. Choose your color palette thoughtfully to transform your backdrop for a visually cohesive backdrop.
Step 2, Measure And Cut The Tablecloths
The accurate measuring and cutting of tablecloths is important for creating a professional-looking table cover backdrop. Begin by getting the dimensions of the backdrop stand or the area where the backdrop will be placed. Measuring tape will help ensure you get accurate measurements so that your tablecloth covers the entire space with no gaps. Mark your measurements on the tablecloths with chalk or fabric marker.
When cutting, use sharp scissors to achieve clean, precise edges. You could aim for a sleek, uniform look or try different cutting styles for various effects. For instance:
- Cutting a scallop pattern looks playful
- A fringed edge gives off a bohemian vibe
- Layer tablecloths of different lengths to create depth and dimension
Accurate measurements and creative cutting result in a stunning custom backdrop. Or you could design custom size tablecloths to get the perfect dimensions.
Step 3, Attach The Tablecloth Strips To Twine Or Mesh Fencing
Attaching your cut tablecloth strips to twine or mesh fencing is simple but effective. To attach to the twine of mesh, consider options like:
- Strong adhesive tape
- Zip ties
- Clothespins
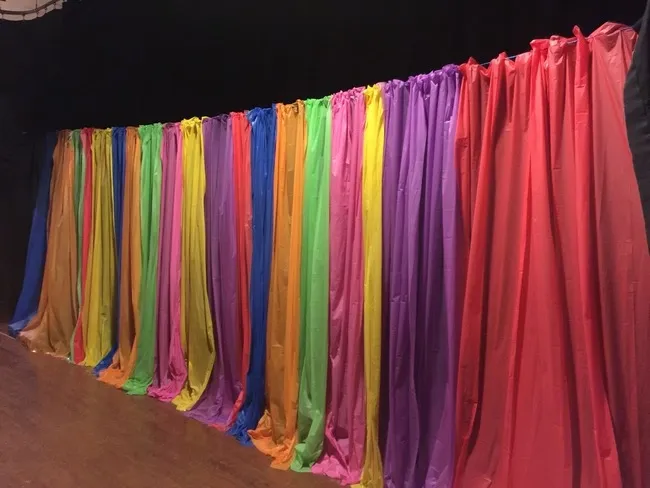
Ensure each strip is firmly fastened to prevent slipping. For a more dynamic backdrop, you could space the strips closely together with slight overlaps to avoid gaps. Layering with different colors or textures will add depth and visual interest. And you could start from the bottom and work upwards for a cascading effect.
Ensure uniform spacing and make sure you step back from time to time to check the overall look. With thoughtful attachment and strategic layering, you will have a secure and visually stunning backdrop.
Step 4, Set Up The Backdrop Stand And Hang The Strips
Setting up your backdrop stand and hanging the strips is the finishing step in how to make a backdrop with tablecloths. Assemble the stand by following the manufacturer’s instructions, ensuring maximum stability and good positioning for your backdrop. It may be best to place it against a wall, and choose a location with good lighting for maximum effect.
Once the stand is prepared, start hanging your tablecloth strips. The twine or mesh fencing can be secured to the stand with clips or hooks. Arrange them by layering and overlapping for the full, textured look you want for your backdrop. Varying the colors and lengths could add further visual interest. Step back from time to time to adjust and achieve even coverage for a cohesive, eye-catching display that boosts your event’s ambiance.
Need multiple backdrops at an affordable price?
Our custom plastic tablecloths can be ordered in bulk with generous wholesale discounts, and you can personalize them with any design to create the ideal photo booth backdrop.
How Do You Create A Photo Booth Backdrop Using Plastic Tablecloths?
It is easy to create a photo booth backdrop using plastic tablecloths, and it is a cost-effective way to add a little fun to any occasion. You will need to gather the following supplies:
- Plastic tablecloths
- Scissors
- Tape
- A sturdy backdrop stand
- String or twine
To enhance durability, choose high-quality table covers like our custom plastic tablecloths that resist tearing.
Begin by cutting the tablecloths into strips or your desired shapes. Use tape or clips to secure the strips to the string or twine, ensuring even spacing and layering for a full effect. When ready, attach the string to the backdrop stand, ensuring it is stable and well-positioned.
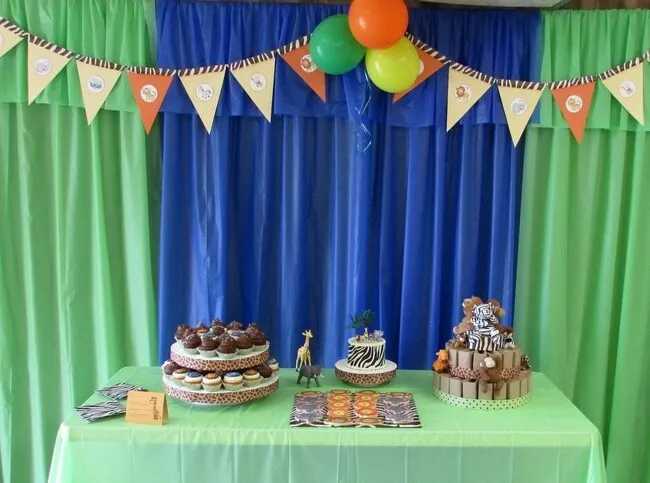
Add a little flair with decorative elements like props, lights, balloons, or banners. These additions can enhance the visual appeal for a more engaging photo booth experience.
Step-By-Step Tutorial For A Photo Booth Backdrop
Creating a tablecloth photo booth backdrop is simple and fun. Here’s is a step-by-step guide:
- Gather your supplies: You need plastic tablecloths, scissors, tape, and backdrop stand, and string.
- Cut the tablecloths: You could cut into strips or other desired shapes.
- Attach strips: Secure the strips to the string or twine with tape.
- Set up backdrop: Assemble the stand and position it carefully.
- Hang the strips: Attach the string to the stand, aiming for even spacing and eye-catching layering.
If you experience sagging with your table cover, tighten the string and add extra clips. High-quality tablecloths are helpful to avoid tearing, and you can reinforce them with tape at stress points. Adjust spacing and layer more strips if you find that some of your strips are uneven.
How Do You Make A Fringe Backdrop?
You can even make a beautiful fringe backdrop from tablecloths with the following process:
- Gather materials: Choose fabric or plastic tablecloths and get scissors and a backdrop stand.
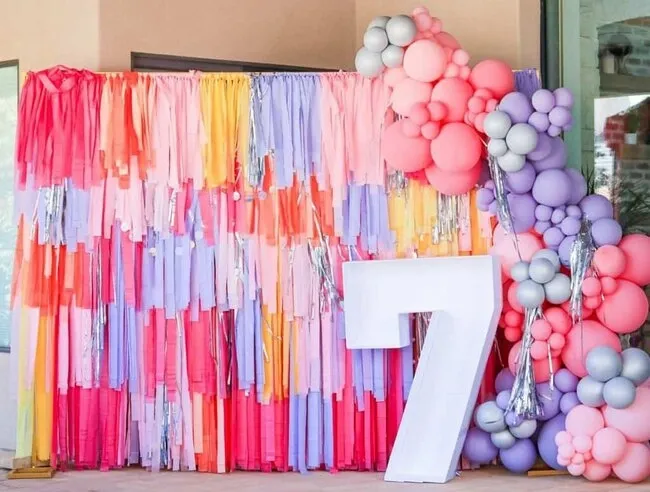
- Cutting: Cut the tablecloths vertically into narrow strips, leaving the top edge intact.
- Create fringe: Cut a fringe along each strip, stopping at the top edge.
- Attach to backdrop stand: Secure the top edge of each strip to the backdrop stand with tape or clips.
- Arrange: Layer and space the strips evenly to create a full, textured effect.
With this simple method, you create a festive and eye-catching backdrop that will work well at parties, events, or photo booths.

Create your own custom tablecloths to use as photo backdrops
When you order custom-printed tablecloths from us, you can personalize the design and get a vibrant and meticulously-crafted photo backdrop for any occasion.
Explore custom design optionsHow Do You Make Plastic Tablecloths Look Nice For A Backdrop?
Plastic tablecloths are not out of style for creating backdrops. You can start the process by steaming the table covers to remove any wrinkles and achieve a smooth appearance. You could also lay them flat under a weighted object overnight to flatten out creases.
Consider the following tips for a polished look:
- Layering: By overlapping tablecloths, you hide seams and create a seamless backdrop.
- Trimming: Cut edges neatly or hide them behind other decorations.
- Decorative elements: Embellish with flowers, balloons, ribbons, or other things to distract from visual flaws.
- Lighting: position lights strategically to minimize the appearance of wrinkles and enhance the overall appearance.
- Backdrop stand: Assemble this securely and attach your tablecloth for a taut, professional aesthetic.
These tips will help you maximize visual appeal for your backdrop using plastic tablecloths, no matter the setting.
What Are The Best Materials For A DIY Backdrop?
The best materials for your DIY backdrop depend primarily on your preferences and needs. Here are some common options:
- Fabric: This choice offers durability, and the best fabrics for tablecloths provide a deluxe appearance when you need a more elegant touch. And they can be reused and raped beautifully.
- Plastic: These tablecloths are affordable, easy to clean, and available in many vibrant colors. This makes them ideal for festive occasions like birthdays or photo booths, but they may lack the elegance of fabric.
- Paper: Inexpensive, lightweight, and available in various patterns, paper is a great option for themed parties of temporary displays. But it may be prone to tearing.
Make your choice based on the atmosphere of your event, your needs, and the budget available to you.
Need a square photo backdrop for Instagram-worthy pics?
Create a custom square tablecloth featuring your logo or other personalized design and it can make a clear and colorful backdrop for your photo opportunities.
How Do You Cut Plastic Tablecloth For A Backdrop?
To cut a plastic tablecloth to create a backdrop, follow these steps:
- Gather supplies: You will need your plastic tablecloth, a measuring tape, scissors, and a flat surface.
- Measure and mark: Use the measuring tape to identify the optimal length and height of your backdrop. Mark these measurements using a fabric marker or chalk.
- Straight cutting: Use sharp scissors and cut along your marked line for a clean, straight edge. Keep the tablecloth flat and taut throughout.
- Fringe cutting: Cut vertical strips into the tablecloth to create a fringe effect, stopping before you reach the top edge. Ensure even spacing for a uniform look.
- Tools: You could use a rotary cutter or a craft knife for even greater precision, particularly with intricate designs.
Follow these steps and use the right tools to effortlessly customize a plastic tablecloth and create a professional-looking backdrop.

Common Mistakes To Avoid When Cutting Plastic Tablecloths:
When you cut plastic tablecloths for backdrops, there are some common mistakes. Here are a few we often see, and advice on how to avoid them:
- Uneven cuts: Use sharp scissors and measure carefully to avoid this error.
- Wrinkles: Prevent wrinkles by keeping the tablecloth flat and taut as you cut it.
- Crooked edges: Marking the lines and cutting slowly and steadily will help keep edges straight.
If you find that you have a jagged edge, trim along that edge carefully with a craft knife or sharp scissors. For accidental tears, apply clear tape on both sides to reinforce the area. Take your time and use high-quality tools for best results.
Frequently Asked Questions About Tablecloth Backdrop Diy
How Do You Make A Cheap DIY Tablecloth Backdrop?
If you want a low-cost solution, we recommend ordering a plastic or paper table cover and customizing it to create a personalized backdrop. You have many options to make it your own, and custom ordering can enable you to get the right colors.
How Do You Make A Plastic Tablecloth Backdrop?
You need to get the right color for your backdrop, then measure and cut to get the right size. Secure it to some twine or string, then mount it to a backdrop stand wherever you want to use it.